недеља, 29. април 2012.

Avocado Fries


Recipe Adapted from Sunset Magazine

Canola oil for frying
1/4 cup flour
1 tsp kosher salt
2 large eggs, beaten to blend
1 1/4 cups panko (Japanese bread crumbs)
2 firm-ripe medium avocados, pitted, peeled, and sliced into 1/2-in. wedges

Grated parmesan for serving (optional)

1. Preheat oven to 200°. In a medium saucepan, heat 1 1/2 in. oil until it registers 375° on a deep-fry thermometer.

2. Meanwhile, mix flour with 1/2 tsp. salt in a shallow plate. Put eggs and panko in separate shallow plates.

3. Sprinkle the avocado slices with the remaining ½ tsp salt.  Dip each slice in flour, shaking off excess. Dip in egg, then panko to coat. Set on 2 plates in a single layer.

3. Fry a quarter of avocado slices at a time until deep golden, 30 to 60 seconds. Transfer slices to a plate lined with paper towels. Keep warm in oven while cooking remaining avocados. Sprinkle with salt and a little grated parmesan.


Oh Versatile Calzones – Cheezy Spinach Version


INGREDIENTS
(for 2 large calzones)    

Dough

¼ whole wheat pizza dough recipe
Spinach mixture

325g spinach, chopped
1 small onion, diced
¼ tsp salt
¼ tsp pepper
Freshly grated nutmeg
100g extra firm tofu, grated
100g low fat mozzarella, grated
1 cup cottage cheese
1 egg

INSTRUCTIONS

Preheat oven to 500F
In a non-stick skillet, cook onion, salt and pepper over medium heat until translucent. Lower heat, add spinach and stir until spinach is completely wilted, about 1 minute. Turn off the heat and set aside.
In a mixing bowl, add cottage cheese, tofu, mozzarella, egg and nutmeg and mix until well combined.
Remove excess liquid from spinach and fold into cheese mixture. Mix until well combined. Set aside.
Divide dough ball in 2 equal pieces and roll or stretch each piece into a 6-8 inch disc. I like to use cornmeal when rolling and stretching my dough as it tends to get trapped into the dough and adds a nice little crunch.
Mound half of the spinach mixture on the center of each of the discs. Flatten it just a bit with a spoon, bringing the mixture more towards one side of the disc.
Fold the dough back onto itself and press lightly on the calzone to form a half moon.
Fold the edges, twice if possible, to seal in the filling.
Transfer to a pizza pan or cookie sheet and cook in the oven for 15-20 minutes, until the crust turns crispy, nice and golden brown.
Serve however, wherever and whenever you prefer!

Zucchini Fritters with Mozzarella and Stewed Grape Tomatoes


Today, I'm sharing a recipe that we enjoyed as an appetizer at our last gourmet gathering at the very end of October. The recipe wasn't assigned to us but I finally got around to making them myself just before Thanksgiving. Although this is a wonderful fall harvest recipe, the ingredients are available at most stores year round. Fresh herbs have been also increasingly available and, at my store, I can buy fresh, living basil in the winter when it's most appreciated.

The stewed grape tomatoes in this recipe are actually cherry tomatoes from my garden. I had quite a few tomatoes that I harvested from my prolific Tumbling Tom cherry tomato plant before the first frost that I froze for recipes just like this.


Zucchini Fritters with Fresh Mozzarella and Stewed Grape Tomatoes


1 pound (about 2 medium sized) zucchini, coarsely grated
5 scallions, finely chopped
2 cloves garlic, very thinly sliced
3/4 cup all-purpose flour
½ cup whole milk ricotta cheese
1 tablespoon grated Parmesan cheese
2 teaspoons finely grated lemon zest
2 eggs
Kosher salt
Ground black pepper
Vegetable or olive oil for frying

Fresh mozzarella (preferably buffalo), and
Fresh basil for garnish

Stewed Grape Tomatoes

2 pint grape tomatoes, rinsed
1 tablespoon red wine vinegar
1 teaspoon sugar
1/4 cup extra virgin olive oil
Salt and pepper to taste
Additional Italian seasonings of your choice - I used the Ariosto seasoning for tomato-based sauces which contains salt, so I deleted any additional salt. Dried oregano and basil would also taste good.

To prepare the zucchini fritters, mix the first 10 ingredients together in a large bowl until blended.

Heat oil in a very large skillet over medium heat and cook fritters in two batches. Drop 2 tablespoons of batter into mounds in the skillet. Do not crowd. Flatten slightly. Cook until browned, for 4 to 6 minutes on each side, turning over once. Transfer to a paper towel-lined plate. Sprinkle with salt. Repeat with remaining batter.

To prepare the stewed grape tomatoes, place olive oil in a large sauté pan over medium heat. When the oil is hot, add the tomatoes and season with salt and pepper. Continue cooking and continuously stirring tomatoes until the skins begin to break open (approximately 8 to 10 minutes). Add the sugar and vinegar and continue cooking for approximately 5 more minutes. Note: I found this process took longer than stated to thicken the tomatoes.

To assemble, place zucchini fritter on an appetizer plate and top with one slice of fresh buffalo mozzarella, 1 tablespoon of stewed grape tomatoes and fresh basil.

Roasted Parmesan Green Beans


Tender crisp green beans roasted to perfection, topped with shredded parmesan cheese. This is the easiest way to prepare the best tasting green beans, picky kid approved!


I'm getting tons of requests for green bean casserole, and I'm not going to lie, I've never been a fan. I dislike soft, mushy green beans, I much prefer them tender crisp. The easiest way to achieve that is by roasting them, they come out consistently perfect every time!

I make these quite often, you can season them however you like, add some crushed red pepper for a little kick or even leave the parmesan off. If you want to double the recipe, I suggest using two baking sheets. Serve them immediately out of the oven for best results.


Roasted Parmesan Green Beans
Skinnytaste.com
Servings: 4 • Serving Size: 1 cup • Old Points: 1 pts • Points+: 2 pts
Calories: 62.4 • Fat: 2.9 g • Carbs: 8.0 • Fiber: 3.8 • Protein: 2.7 g • Sugar: 0
Sodium: 38.4 mg (without salt)

Ingredients:

12 oz green beans, trimmed (make sure they are dry)
2 tsp olive oil
kosher salt + fresh cracked pepper to taste
1/4 tsp garlic powder
1 1/2 tbsp shredded parmesan

Directions: 

Preheat the oven to 425°F. Line a baking sheet with aluminum for easy clean-up.
Lay green beans out on the baking sheet and drizzle oil over them. Season with salt, pepper and garlic powder and toss to evenly coat.


SALT AND VINEGAR BROILED FINGERLING POTATOES


Sometimes when I get too busy, I end up assigning a lot of tasks to my pretend intern. She is not super-effective. Sometimes I think her lack of effectiveness stems from my own carelessness in having hired the wrong Myers-Briggs personality type for the job. (She’s a total INFP.) Sometimes I think her lack of effectiveness stems from the fact that she is pretend. Either way, today she has only one thing to do. She is clearing my calendar so I can sit at home and eat potatoes.

This isn’t the way the day was supposed to go. I woke up before six, because babies do not appreciate the subtleties of Daylight Savings. (They do not fall back, and they do not fall back to sleep.) I went to the gym. I did weighted walking lunges. This was not a day to mess with me. But since June I have had one of those irresistible little Martha Stewart Living pull-out recipe cards in my files. The kind with the dappled lighting they pretend is filtering through the trees and onto your perfectly adorned picnic table. The kind it is not a day to mess with. And that’s not all. Since July I have had a large bottle of white vinegar in the pantry. And since Sunday’s farmers’ market I have had several pounds of perfect little fingerling potatoes burning a hole in my concentration. Something had to give.

Something gave. It was my schedule.

The recipe below serves four in typical circumstances. Under certain conditions, however, it serves one. And that is all I plan to say about that.

The original recipe calls for finishing these beauties on the grill. Since we’re headed toward colder days, I’ve broiled them instead, which worked out nicely (but feel free to grill them on medium-high heat for the same amount of time if you’re one of those types). I won’t lie—they’re a little intense. In fact, I’d guess that Myers-Briggs would classify them as an ESTJ. They could probably finish my chores in less than half the time my current intern takes. In both of these situations, intensity can be a very desirable characteristic, and I will definitely be hiring back these little extroverts in the near future. For example, at dinnertime.

SALT AND VINEGAR BROILED FINGERLING POTATOES


Ingredients

1 pound fingerling potatoes, sliced lengthwise to 1/4-inch thickness*
2 cups white or malt vinegar
Extra virgin olive oil
Kosher Salt
Pepper

Method

1. In a small pot, combine the potato slices and vinegar. Bring to a boil, then lower the heat and simmer until fork-tender, about 8 minutes. Let cool in liquid for 30 minutes. Then drain well and pat potatoes dry with paper towels.

2. Preheat the broiler with a rack about 6 inches below the heat source. Dump the potato slices onto a sheet pan, sprinkle very generously with olive oil, salt and pepper, and toss to coat. Arrange the potato slices in a single layer. Broil until lightly browned on top, about 7 minutes. Then flip the slices and broil until the underside is lightly browned, about 5 minutes more. Serve warm.

*Please be careful with your own fingerlings when slicing. The potatoes can be a little slippery.


Honey Yogurt Berry Pops


Bring on the fireworks, slather on that sunscreen and party hardy with family and loved ones. And if you’re experiencing the same sweltering hot weather as we’re having in Texas you’ll appreciate this recipe for Honey Yogurt Berry Pops. It’s a healthy way to stay cool and it literally takes a few minutes to make. I used the Norpro popsicle molds and they worked great, I recommend letting the pops defrost for 3-5 minutes before trying to pop them out.

Ingredients

2 cups 0% Greek Yogurt, I used Fage (Chobani will work as well)
1/2 cup raw honey
1 cup mixed berries, washed (blueberries, strawberries, blackberries)

Instructions

1. Blend yogurt and honey together in a large bowl. Fold mixed berries in. Transfer into a container with a spout so the mixture can be poured into popsicle molds. Fill popsicle molds close the top and put in popsicle sticks. Freeze for 3 hours or overnight.
2. You can use any of the remaining mixture and blend it with some ice for a yogurt berry smoothie!


среда, 25. април 2012.

HOW TO make onion-ring eggs


The Apron Strings cooking blog continues its run of excellent ideas for making molded eggs by frying them inside vegetable cross-sections with this lovely recipe for onion-ring eggs: just half-cook rings of sliced onion, turn over, and crack in an egg. Add some water to the pan and cook covered over low heat. Be sure to click through for links to other variations, including some perfectly lovely flower-power eggs cooked in sectioned, floral-looking sweet peppers.

Fruit Salad Ice Cream Cone

Fruit Salad Ice Cream Cone ~ Dressing up fruit salad, a picnic side dish standard, with some crafty fun in an ice cream cone.


Fruit Salad Ice Cream Cone


Before you tell me I’m mad in the head, which by the way you would be right, I will say it before you can,“This is not a recipe, but merely a presentation idea”.

That being said, I set out to get crafty and re-fashion a picnic standard, the fruit salad, into something fun and stylie (real word if you play scrabble with me). Determined to dump the de rigueur watermelon bowl, I needed something simple and picnic friendly.

Enter the ice cream cone. I love this idea. It’s easy, convenient and best of all who doesn’t get a little childhood nostalgia when you see an ice cream cone.

No recipe just a few notes:

Place a cupcake liner inside the cone to prevent it from getting soggy.
To offset the Ice Cream Cone Fruit Cups from being top heavy, I filled the bottom portion of the cone with candy. Aside from its weight utility, kids love the candy-filled surprise ending. My taste preference is for Skittles and they don’t melt, so even better. If you prefer to bypass the candy route you can fill the bottoms with rice, but . . . boring!
For easy stacking use at least two different size melon ballers. 


Blueberry Mint Lemonade


With warm weather struggling to break up the snow and ice (or fog, depending on what part of the country you live in), I couldn't imagine anything more delicious on a Friday afternoon than a tall, cold glass of lemonade. Add blueberries for sweetness and mint for a bit of excitement and you'll have warm weather, if only in a glass!

Blueberry Mint Lemonade

1 cup of freshly squeezed lemon juice
3/4 cup superfine sugar
4 cups water
1 cup fresh blueberries, stems removed
1/3 cup fresh mint

Juice lemons into a large pitcher; add sugar and water, then stir to combine and dissolve. Add blueberries and mint, then serve.

Notes: The longer you let this lemonade stand, the more the flavors will mix and mingle. Whip up this easy recipe in the morning and it will be perfect with lunch!
Missing your Friday night cocktail? Just add a ounce or two of vodka to each glass, then stir!


Double Decker Taco Cupcakes


Wonton wrappers make for perfectly sized pasta squares that can be layered in muffin tins with taco meat, beans, cheese, and crushed chips.


Seriously yummy, cute, and super fast.


Prep Time: 10 min                          Total Time: 30 min                       Serving Size: 18 cupcakes


Ingredients

-1 pound ground beef
-1 (1.25 ounce) package of Old El Paso taco seasoning mix
-36 wonton wrappers
-1 (16 ounce) can Old El Paso refried beans
-36 tortilla chips
-2 cups shredded cheddar cheese
-optional toppings: sour cream, diced tomatoes, cilantro, onion


Directions

1. Preheat the oven to 375 degrees. Spray 18 muffin cups with cooking spray.
2. Brown beef in a skillet and drain the fat. Add the taco seasoning mix and water called for on the package and simmer for 4-5 minutes. Set aside.
3. Place one wonton wrapper in the bottom of each muffin cup. Layer about 1 Tbsp of refried beans on top of each wonton. Crush one tortilla chip on top of the beans. Top with 1 Tbsp of taco meat and 1 Tbsp of shredded cheese. Repeat the layers again with a wonton wrapper, refried beans, tortilla chips, taco meat, and cheese.
4. Bake for 15-18 minutes or until golden brown.
5. Remove cupcakes from tin and top with your favorite taco toppings (i.e. sour cream, diced tomatoes, onion, or cilantro)


avocado, tomato, sprouts & pepper jack with chive spread


Ingredients:

Chive Spread

1/4 cup Greek yogurt
1 tablespoon finely chopped fresh chives
Salt and pepper, to taste

Avocado Salad

-1 avocado, peeled, pitted and diced
-1 tomato, cored and chopped
-1 cucumber, peeled, seeded and diced
-Squeeze of lime juice
- 2 tablespoons chopped fresh basil or cilantro
-Salt and pepper, to taste
-4 slices whole grain bread or 4 small mulitgrain tortillas
-1/4 cup alfalfa sprouts
-2 to 4 slices lite pepper jack cheese

In a small bowl, mix the Greek yogurt and chives. Season with salt and pepper. Set aside.

In a medium bowl, gently toss together the avocado, tomato, cucumber, lime juice and basil or cilantro. Season with salt and pepper, and set aside.

Spread the chive-yogurt mixture on all four bread slices. Divide the sprouts between two slices of bread, and top with avocado salad and cheese. Cover with the remaining slices of bread. (If using tortillas, spread the chive-yogurt mixture on the tortillas, and top with cheese, avocado salad and sprouts. Roll, and eat.) Makes 2 large sandwiches or 4 small wraps.


Watermelon Lime Sorbet Slices

A sweet and tangy watermelon lime sorbet is a great way to cool off in the summer. As a bonus, this recipe is frozen back in the watermelon rind and cut off into slices.


It’s hot. The type of heat where when you step outside the door and your skin is wet before the door swings shut behind you. It’s a hot that hangs in the air, letting you breathe it in, that is cured only by two things: being completely immersed in water or hiding indoors, the air conditioning cranked as far as it will go.

I find that the heat makes me very unmotivated to do things like take a walk, water and weed the garden (though I have forced that one on myself) and prepare food and eat it. However, when the promise of cooking provides ice cold watermelon sorbet, I just may be convinced. I’m fairly certain it didn’t take much convincing to get the kids to come grab a slice or sorbet either.

Start by cutting your watermelon as a simple syrup simmers on the stove. If you’re going to serve your sorbet in the rind, cut a watermelon (smaller is better) in half and scoop the watermelon flesh out. Place the hollowed-out rinds in the freezer to get cold while you make your sorbet.


When your simple syrup is cool and watermelon chunked, blend them together in a food processor or blender until smooth. Add in lime juice to cut the sweetness. The first time we made watermelon sorbet we didn’t do this, and it was much too sweet for our taste. I went with a 1/3 cup lime juice.


Cool the liquid completely in the refrigerator for a few hours. When it’s good and cold, throw it in your ice cream machine and freeze. If you saved them, take your watermelon rind out of the freezer and fill it with your sorbet, perhaps throwing in a few mini chocolate chip “seeds” along the way.


This then goes into the freezer. It really doesn’t need that long, and if you let it sit for four to five hours, you’ll be ready to slice easily. Longer freezing just requires you to take it out a bit before you want to scoop or slice. No rind? Just store in an airtight container until ready to serve.


A few tips if you want to make slices:

Use a small, personal size watermelon.
Freeze only long enough for the sorbet to set, or if you freeze longer, give it a good amount of time on the counter to soften up.
Dip your knife (I used a large chef’s knife) in warm water in between each cut, and try to cut 2″-3″-thick slices off the watermelon. Too thin and they don’t hold together as well.
How are you staying cool in the midst of this heat wave? Are you enjoying the pool, spending time hiding indoors or heading towards museums and other air-conditioned retreats?

Watermelon Lime Sorbet

1 cup water
1 cup sugar
8 cups cubed fresh watermelon
1/3 cup lime juice

Place water and sugar in a saucepan over medium heat. Bring to a boil and cook until sugar is completely dissolved to create a syrup. Remove from heat and allow to cool.

In a food processor or blender, mix together watermelon cubes, syrup and lime juice. Blend until smooth. Add to an ice cream machine and freeze according to manufacturer’s directions. Serve immediately as soft serve sorbet or freeze in an airtight container and remove a few minutes prior to serving to let soften for scooping.


Makes 8-10 servings.


Sweet Potato Cauliflower Soup


Yes, it’s another orange soup. There may be more this month, so fair warning! But this one is a pretty awesome recipe, if I do say so myself.
This soup has a pleasant depth and is slightly sweet from the addition of those pretty orange potatoes and roasted cauliflower. The sweetness is delicately enhanced with a light sprinkle of garam masala. And, the chunky veggies and thick and creamy broth make it good choice for lunch or a light dinner.

 Sweet Potato Cauliflower Soup


1 large head cauliflower (the one I used was at least 7″ in diameter
olive oil for drizzling
Few dashes garam masala (optional)
3 medium to large sized peeled sweet potatoes, cut into 1″ pieces
1 sweet onion, diced
2 cloves garlic
7 cups filtered water
First, preheat your oven to 400 °F and cut up your cauliflower into bite sized pieces. Sprinkle cauliflower lightly with garam masala. Place cauliflower onto ungreased cookie sheet and lightly drizzle with olive oil. Place in oven and let roast until golden brown on the tops and tender, but not mushy, about 20-30 minutes. There’s no need to flip ‘em. Just remove from oven and let cool while you cook the rest of the soup.
In large stockpot, bring sweet potato, onion, garlic and water to a boil. Salt (abt 3/4 tsp) and stir. Reduce heat and allow to remain at a constant simmer until sweet potatoes are tender. Add in cooked cauliflower and divide soup into 2 parts.
Let soup cool and then blend one part soup in blender until very smooth. Combine with second part soup and stir. Salt to taste and warm up over stovetop if needed.


уторак, 24. април 2012.

Bacon, Egg, and Toast Cups


Ingredients


3 tablespoons unsalted butter, melted
8 slices white or whole-wheat sandwich bread
6 slices bacon
6 large eggs
Coarse salt and ground pepper

Directions


Preheat oven to 375 degrees. Lightly butter 6 standard muffin cups. With a rolling pin, flatten bread slices slightly and, with a 4 1/4-inch cookie cutter, cut into 8 rounds. Cut each round in half, then press 2 halves into each muffin cup, overlapping slightly and making sure bread comes up to edge of cup. Use extra bread to patch any gaps. Brush bread with remaining butter.
In a large skillet, cook bacon over medium, until almost crisp, 4 minutes, flipping once. (It will continue to cook in the oven.) Lay 1 bacon slice in each bread cup and crack an egg over each. Season with salt and pepper. Bake until egg whites are just set, 20 to 25 minutes. Run a small knife around cups to loosen toasts. Serve immediately.

Cook's Note


Standard muffin pans come in 6- or 12-cup size; if baking 6 items in a 12-cup pan, leave empty space in between. Nonstick pans are nice but not essential. Beware of very thin pans, which often lead to burning. Place pans on a baking sheet to make them easier to get in and out of the oven.


Spring Forward to Summer: Chocolate and Salted Caramel Pudding Pops


Spring has just begun and I’m already fast forwarding to summer with these pudding pops. It’s hard to deny a chocolate and salted caramel pairing.  Especially one on a stick that is begging you to have a seat and enjoy the slow pacing a popsicle has to offer — that is if you can keep yourself from biting into it.

Incredibly easy to make and even easier to devour, you should have no problem whipping up a dozen or more of these in under 30 minutes. The hardest part will be waiting for them to freeze. Let me say that if you’ve never had a pudding pop, well it’s a lot like a Fudgiscle but better and richer.
So relax, enjoy and yield to the slow pace of licking a popsicle.
Chocolate and Salted Caramel Pudding Pops


Makes approximately 1 dozen pops
Chocolate Pudding


1/3 cup cornstarch
½ cup granulated sugar
Pinch of salt
3 cups cold whole milk
3/4 cups dark chocolate, chopped
1 tablespoon vanilla extract

Instructions:

Combine cornstarch, sugar, salt and whole milk in a blender or food processor and pulse until well blended. Alternatively, combine all ingredients in a bowl and whisk vigorously. Transfer mixture to a heat-proof bowl and place over (not on) simmering water for approximately 15-20 minutes, stirring occasionally. Pudding is ready when mixture coats the back of the spoon.  Add chocolate and stir to combine. Add vanilla and stir to combine.

Salted Caramel Pudding

1/3 cup cornstarch
½ cup granulated sugar
Pinch of salt
3 cups cold whole milk
1/2 cup salted caramel sauce (recipe follows)*
1 tablespoon vanilla extract

Instructions:

Combine cornstarch, sugar, salt  and whole milk in a blender or food processor and pulse until well blended. Alternatively, combine all ingredients in a bowl and whisk vigorously. Transfer mixture to a heat-proof bowl and place over (not on) simmering water for approximately 15-20 minutes, stirring occasionally. Pudding is ready when mixture coats the back of the spoon.  Add salted caramel and stir to combine. Add vanilla and stir to combine.

*Salted Caramel Sauce

½ cup granulated sugar
2 tablespoons water
2 tablespoons unsalted butter
6 tablespoons of heavy cream
½ teaspoons of kosher salt

Instructions:

Add sugar and water into a saucepan over medium low heat. Stir until sugar has dissolved. Use a wet brush to remove any crystals that form on the side. Once sugar has dissolved increase heat to high. Now and then, using the handle give the pot a swirl to keep the mixture moving. Do not stir the mixture directly. The mixture will start to bubble after a minute. As the mixture darkens to a medium amber color, approximately 5-7 minutes, add the butter and cream to saucepan. The mixture will bubble wildly. Whisk to combine (bubbles will subside upon cooling). Add salt and stir to combine.

Assembly:

For easy layering place cooled pudding in a pastry bag or Ziploc bag and cut the corner. Pipe alternating layers of chocolate and salted caramel pudding into a small Dixie type of cup. Place cups in the freezer for one hour until the pudding becomes semi firm, then place a popsicle stick in the middle an continue to freeze for another 2 hours.


Cheesy Bacon Stuffed Mini Potatoes


Ingredients

2 pounds Yukon gold potatoes (1 1/2 to 2 inches in diameter)
1 (8-ounce) package cream cheese, softened
1 cup sour cream
1/2 cup cooked, crumbled applewood smoked bacon, divided
2 teaspoons roasted mashed garlic
1 1/2 teaspoons salt, divided
1/2 teaspoon freshly ground black pepper, plus more for garnish
1/4 cup finely grated sharp Cheddar cheese
1/4 cup finely grated Monterey Jack cheese
3 tablespoons chopped green onion, plus more for garnish

Directions

Preheat the oven to 400 degrees F. Line a baking sheet with aluminum foil.

In a large Dutch oven, place the potatoes and enough water to cover and bring to a boil. Boil until just tender, about 8 minutes. Drain and let cool. Cut the potatoes in half crosswise. Cut a thin slice off the round end of each potato half to stand upright. Using a melon baler, scoop out the centers of the potatoes, leaving a 1/4-inch thick shell. Reserve the potato pulp.

In a medium bowl, combine the potato pulp, cream cheese, sour cream, 1/4 cup bacon, garlic, 1 teaspoon salt and pepper. Mash with a potato masher until well combined. Stir in the Cheddar cheese, Monterey Jack cheese and green onions.

Sprinkle the insides of the potato shells with the remaining 1/2 teaspoon salt. Spoon the potato mixture evenly into the potato shells and top with the remaining 1/4 cup bacon. Place the stuffed potatoes on the prepared baking sheet and bake until lightly browned, about 20 minutes. Garnish with green onions and freshly ground pepper, if desired.


Zucchini Chips


Ingredients:

-1/4 cup Homemade Breadcrumbs
-1/4 cup grated Parmesan cheese (optional)
-1/8 tsp black pepper
-heaping 1/2 cup whole wheat flour
-1 cup cold milk (I used oat milk)
-1 tsp apple cider vinegar
-2 1/2 cups sliced zucchini (about 2 small zucchinis)


Preparation:

Preheat oven to 425 degrees.
In a medium bowl combine breadcrumbs, cheese (if using) and black pepper.
In separate bowl add flour, milk and vinegar.  Gently stir until combined but do not over stir.
Dip zucchini slices in flour mixture and then dredge in breadcrumb mixture.
Place coated zucchini slices on a baking sheet (I line mine with non stick foil for easy clean up!) and bake for 30 minutes, flipping the slices over once halfway through cooking, or until browned and crisp.

Nutritional Info:

Makes 2 servings.
Nutrients per serving:  Calories: 224.5, Cal. from Fat: 33.5, Total Fat: 3.5g, Sat. Fat: 0g, Carbs: 41.5g, Fiber: 6.5g, Sugars: 12g, Protein: 9g, Sodium: 459mg, Chol: 0mg

Notes:

These chips are best eaten right out of the oven.  They don’t save well.

Caramel Cheesecake Apple Dip


Ingredients: 
12 ounces cream cheese, at room temperature
3 Tbs. heavy cream
1/4 cup powdered sugar
1/2 tsp. vanilla

Caramel sauce (recipe below) or store bought
Heath milk chocolate pieces
mini chocolate chips
2-4 Granny Smith or other crisp tart apples, sliced and soaking in lemon juice/water until ready to serve

Method:
This is the method is to make a layered dip, for a quick method see note below.
Line a six inch cake pan or springform pan with plastic wrap. Use enough plastic wrap to hang over the sides of the pan about 2 inches.


Place softened cream cheese in a mixing bowl and beat on medium speed until smooth. Scrap down the sides of the bowl. Add the heavy cream and powdered sugar, mix well, until smooth. Place half of the cream cheese mixture in the lined pan and smooth with the back of a spoon. (If you dip the spoon into warm water before you start to smooth the cream cheese, it will be much easier to spread.) Spoon on a layer of caramel. Sprinkle with a layer of chocolate chips and the Health pieces. How much you use is up to you but don't go to overboard or you may have trouble spreading the top layer of cream cheese.


Place in the refrigerator for about 20 minutes. This will let the caramel set up a bit and make topping it with the remaining cream cheese much easier. Scoop the remaining cream cheese on top and smooth out using the back of a dampened spoon, like you did for the first layer. Fold the overhanging plastic wrap over the top and refrigerate for at least 2 hours, up to overnight. Pull back the plastic wrap so that the top of the cheesecake is exposed. Place a serving plate on top of the pan and invert. Remove the pan and the plastic wrap. Spoon caramel sauce over the top of you cheese cake and top with more of the Heath pieces and chocolate chips. Place the sliced apples around the dip and serve.
*Note: If you want to throw this together super fast, just spread all the cream cheese on a serving platter and top with the caramel, Heath bits, and the mini chocolate chips. 


Caramel Sauce

Ingredients: 

1 cup sugar
1/4 cup water
8 tablespoons unsalted butter, cut into pieces
1/2 cup heavy cream
2 teaspoons vanilla (or 1 teaspoon vanilla and 2 teaspoons bourbon)
pinch of sea salt

Method:

Place sugar in a small heavy sauce pan. Pour water evenly over the top. Turn stove top to medium-high heat. Hold sauce pan by the handle and swirl occasionally until sugar has dissolved. Turn heat to high, and boil until syrup turns brown around the edges of the pan, about 6-8 minutes. Swirl the syrup occasionally until it turns a deep amber and just begins to smoke.
Remove pan from heat. Add butter and whisk, until all butter is mixed in. Stir in cream. Take care adding the butter and cream as the caramel will boil up and sputter quite a bit.
If sauce has any lumps, set pan over low heat and stir until smooth then turn off heat again.
Stir in vanilla and salt. 


Apple braid


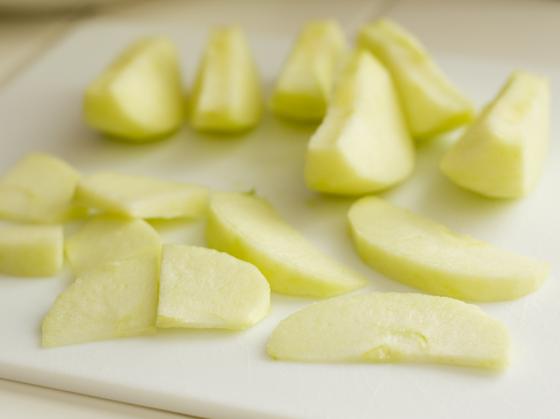
I love a good apple pie, but wasn’t really in a pie mood.  Then, when I woke up one morning craving homemade bread, inspiration struck.  Apples + Homemade Bread = An Apple Braid!  So I sliced up the apples into pieces,


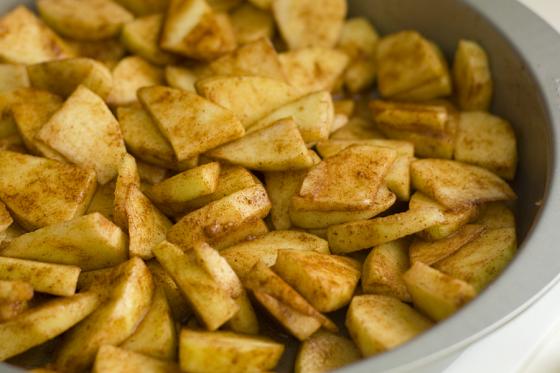
tossed them with cinnamon, sugar, and lemon juice and threw them in the oven to start cooking while I made the dough for the braid.


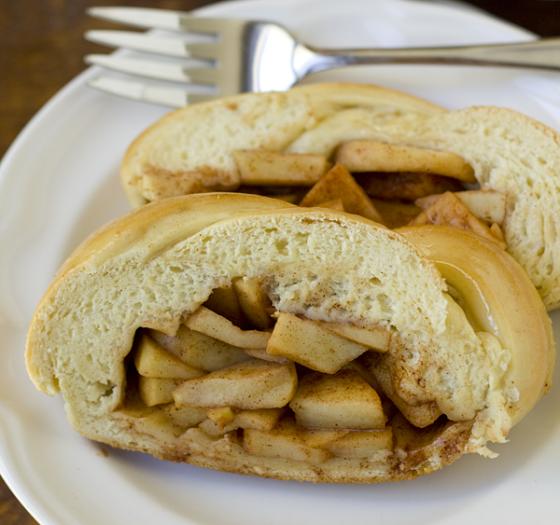
When the dough was ready, I rolled it out into a big rectangle, then cut each side into strips.  Next I spread the apple filling down the uncut center of the dough, and then crisscrossed the strips of dough over the filling to create a braided effect.


The finished braid went onto a baking sheet into the oven until it was a nice light golden brown.  Then I brushed a vanilla cream glaze over the hot braid and set the braid aside to finish cooling.  This was the hard part—waiting for the braid to cool.  But it’s worth the wait, because the glaze will have time to set a bit, and the filling will have time to cool so that you don’t burn your tastebuds off trying to eat a slice!


Apple Braid


Makes 1 bread (approximately 12 servings)

For the Apple Filling

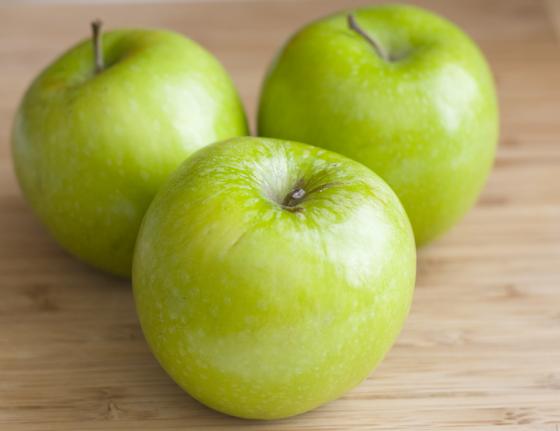
3 medium-size Granny Smith apples
3 tablespoons granulated sugar
1 1/2 teaspoons cinnamon
2 teaspoons lemon juice

For the Bread

2 1/2 cups bread flour
1/4 cup granulated sugar
1 tablespoon instant yeast (I prefer SAF Instant Yeast)
3/4 teaspoon salt
1 cup warm water
2 1/4 teaspoons vegetable oil

For the Glaze:
1/3 cup confectioner’s sugar, sifted
5 teaspoons whipping cream
1/2 teaspoon vanilla extract
Pinch of kosher salt
Pinch of nutmeg

Preheat the oven to 350 degrees Fahrenheit.

Make the Apple Filling: Peel, core, and slice the apples into thin slices, then cut the slices in half. Toss the apple pieces with the sugar, cinnamon, and lemon juice. Bake the apple filling in an 8-inch square baking pan (or 9-inch pie tin) for 15 minutes. Remove from the oven and set aside. (Note: Do not turn the oven off at this point. You will be using it to bake the finished braid.)

Make the Bread: While the apple filling is baking, begin preparing the bread dough. Mix the dry ingredients together in a large mixing bowl. Add the water and oil and mix the dough for 6 minutes using an electric mixer on medium-high speed.

Spray a smooth clean surface with cooking spray and turn the dough out onto the surface. Knead the dough briefly to give it a smooth surface (this will only take several turns of the dough to accomplish). Spray a rolling pin with cooking spray and roll the dough out into a large rectangle, about 12-inches by 16-inches in size. Lift onto a greased baking sheet.

Using a pizza cutter or sharp knife, cut each side into strips about 1-inch wide down each side, leaving the center third of the dough uncut. Spread the apple filling down the middle third of the dough. Fold strips of dough into the center, crisscrossing the filling by alternating strips from each side. Lightly press ends to seal, and straighten out the braid with your hands, if necessary, to straighten.

Bake the braid in the oven for 25 minutes, or until golden brown. Remove from the oven and let the braid cool for several minutes.

Make the Glaze: Whisk together the glaze ingredients in a small bowl until blended and smooth.

Brush the glaze in a thick coat over the entire surface of the apple braid while it is still cooling. Carefully transfer the braid to a cooling rack set on a baking sheet (to catch drips) to finish cooling and prevent the bottom of the braid from becoming soggy from sitting in any pooling glaze. Slice and serve.


понедељак, 23. април 2012.

Broccoli and Italian Sausage Egg Muffins


Ingredients


1 pound Italian Sausage (sweet, mild, hot variety depending on your preference)
1 cup broccoli florets
8 large eggs
1/4 cup milk (or half and half depending on how you're feeling that day)
1/2 tbsp vegetable oil
1/2 tsp baking powder
salt & pepper to taste
Freshly grated Parmesan Cheese as needed

Directions


1. Preheat oven to 375 F.
2. In a large saute pan, over medium high heat, brown Italian Sausage for about 5 minutes, or until the sausage is no longer pink. Remove from heat and stir in broccoli.
3. Whisk together eggs, milk, oil and baking powder.  Season with salt and pepper.
4. Lightly spray a 12-cupcake pan with oil.Spoon out the sausage and broccoli mixture evenly into each cupcake.
5. Ladle the egg mixture over sausage and broccoli.
6. Sprinkle with Parmesan cheese.
7. Bake for 15-20 minutes.


Summer Pineapple Strawberry Cooler


1 12-ounce can frozen pineapple juice concentrate, thawed
1 6-ounce can frozen limeade concentrate, thawed
4 cups cold water * 1 liter club soda, chilled
Ice cubes
Fresh strawberries (optional)
Short (6-inch) wooden skewers
Assorted fruits such as halved orange slices, halved lime slices, orange sections, raspberries, strawberries, sliced kiwifruit, and mint sprigs

Superfood Salad with Lemon Vinaigrette


Superfood Salad with Lemon Vinaigrette combines ultra-healthy and flavorful ingredients like quinoa, pomegranate, citrus, avocado and beans, in a light-yet-filling meal, that’s bursting with satisfying flavors and textures.

Eat by itself, or topped with shrimp or grilled chicken.


Superfood Salad with Lemon Vinaigrette


Serves 5

Ingredients:

1/2 cup dry quinoa

1/3 cup red onion, chopped

1 orange, peeled and segments chopped

1 avocado, chopped

1 cup canned black beans, rinsed and drained

1 cup pomegranate arils (about 1 pomegranate worth)

1 cup frozen corn, thawed

1/3 cup cilantro, chopped

salt & pepper

For the Lemon Vinaigrette:

2 lemons, juiced (need 1/4 cup juice)

2 garlic cloves, microplaned or finely minced

dash of sweetener (agave nectar, stevia or white sugar)

salt & pepper

6 Tablespoons extra virgin olive oil

Directions:

1. Cook quinoa according to package directions. Set aside to cool.

2. For the Lemon Vinaigrette: combine all ingredients in a jar with a tight fitting lid, and shake to combine. Or, add lemon juice, garlic, sweetener, salt and pepper into a small bowl and whisk in oil.

3. Combine cooled quinoa with red onion, orange segments, avocado, beans, pomegranate arils, corn, cilantro, salt and pepper. Pour Lemon Vinaigrette over the salad and stir to combine. Serve cold or at room temperature.


A rosewater meringue with black currants and cream.


Meringue is always easier to make in large quantities. (The same goes for mayonnaise, in my experience.) You will find you have a few meringues left over for the next day. They will keep in an airtight container quite well.
Serves 6
For the meringues:
eggs – 5
caster sugar – 300g
a few drops of rosewater
 double cream - 300mls

For the blackcurrant sauce:
black currants - 300g
caster sugar - 3 tablespoons
water - 2 tablespoons


Line a baking sheet with non-stick baking parchment. Set the oven at
180˚C/Gas 6.
Make the meringues: scatter the sugar over a baking sheet, put it in the oven then leave for 10 minutes or so until warm. Whip the egg whites till firm and fluffy then fold in the warm sugar. Keep beating for a good 5 minutes with the electric wish until the meringue is shiny. Place large heaped spoonfuls of mixture on the baking sheet, leaving room for the meringues to spread and puff. Put the meringues in the oven and immediately turn the heat down to 120˚C/Gas 1. Bake for about an hour, turning down the heat if they are browning too much – you want them to be a pale honey colour.
         When the meringues are crisp on top, let them cool. The ideal is for them to remain fudgy inside.
         Make the sauce below and chill. Whip the cream till it will just about keep its shape, it shouldn’t be so thick that it will stand in peaks. Press the centre of each meringue with the back of a spoon so that you make a hollow. Pile the cream inside. Serve the sauce in a jug to pour over as you eat.

For the sauce:
for the blackcurrant sauce:
300g black currants
3 tablespoons sugar
2 tablespoons water

.          Pull the black currants from their stalks. Put them into a saucepan
with the sugar and water and bring to the boil. As soon as the berries start
to burst and the juice turn a dramatic purple remove from the heat and set
aside. Leave to cool slightly.

четвртак, 19. април 2012.

Baked ricotta with cinnamon cherries


Preparation Time

5 minutes

Cooking Time

5 minutes

Ingredients (serves 2)

1 x 300g pkt frozen Creative Gourmet Pitted Cherries
1 x 7cm cinnamon stick
45g (1/4 cup) icing sugar mixture
125ml (1/2 cup) Cointreau liqueur
1 x 250g pkt Margaret River Baked Ricotta

Method

1. Combine cherries, cinnamon, icing sugar and Cointreau in a bowl. Set aside, stirring once, for 1 hour to macerate.
2. Place the ricotta on a microwave-safe plate. Heat in microwave, covered, on medium/500watts/50% for 1 minute or until heated through.
3. Place the ricotta on a serving plate and top with some of the cherry mixture. Serve with remaining cherry mixture.

Notes

For a child-friendly twist, replace the Cointreau liqueur with 125ml (1/2 cup) orange juice. Allow 1 hour macerating time.