недеља, 29. април 2012.

Honey Yogurt Berry Pops


Bring on the fireworks, slather on that sunscreen and party hardy with family and loved ones. And if you’re experiencing the same sweltering hot weather as we’re having in Texas you’ll appreciate this recipe for Honey Yogurt Berry Pops. It’s a healthy way to stay cool and it literally takes a few minutes to make. I used the Norpro popsicle molds and they worked great, I recommend letting the pops defrost for 3-5 minutes before trying to pop them out.

Ingredients

2 cups 0% Greek Yogurt, I used Fage (Chobani will work as well)
1/2 cup raw honey
1 cup mixed berries, washed (blueberries, strawberries, blackberries)

Instructions

1. Blend yogurt and honey together in a large bowl. Fold mixed berries in. Transfer into a container with a spout so the mixture can be poured into popsicle molds. Fill popsicle molds close the top and put in popsicle sticks. Freeze for 3 hours or overnight.
2. You can use any of the remaining mixture and blend it with some ice for a yogurt berry smoothie!


среда, 25. април 2012.

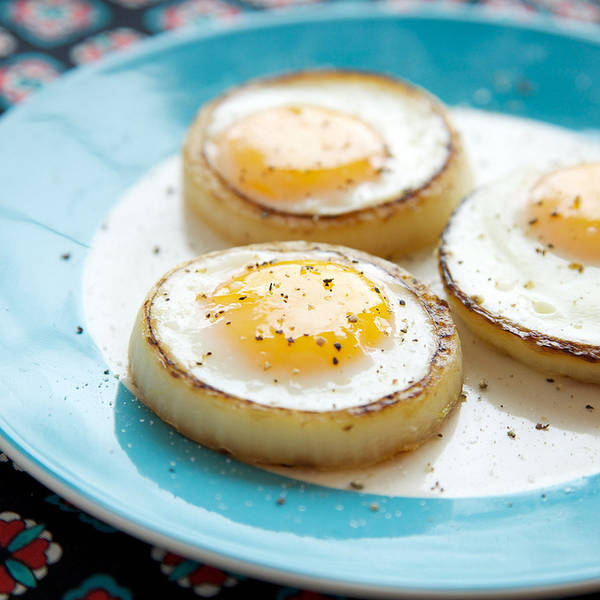
HOW TO make onion-ring eggs


The Apron Strings cooking blog continues its run of excellent ideas for making molded eggs by frying them inside vegetable cross-sections with this lovely recipe for onion-ring eggs: just half-cook rings of sliced onion, turn over, and crack in an egg. Add some water to the pan and cook covered over low heat. Be sure to click through for links to other variations, including some perfectly lovely flower-power eggs cooked in sectioned, floral-looking sweet peppers.

Fruit Salad Ice Cream Cone

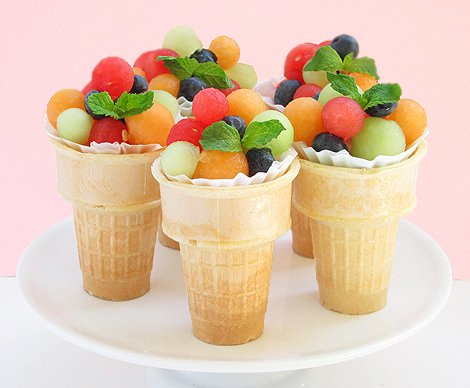
Fruit Salad Ice Cream Cone ~ Dressing up fruit salad, a picnic side dish standard, with some crafty fun in an ice cream cone.


Fruit Salad Ice Cream Cone


Before you tell me I’m mad in the head, which by the way you would be right, I will say it before you can,“This is not a recipe, but merely a presentation idea”.

That being said, I set out to get crafty and re-fashion a picnic standard, the fruit salad, into something fun and stylie (real word if you play scrabble with me). Determined to dump the de rigueur watermelon bowl, I needed something simple and picnic friendly.

Enter the ice cream cone. I love this idea. It’s easy, convenient and best of all who doesn’t get a little childhood nostalgia when you see an ice cream cone.

No recipe just a few notes:

Place a cupcake liner inside the cone to prevent it from getting soggy.
To offset the Ice Cream Cone Fruit Cups from being top heavy, I filled the bottom portion of the cone with candy. Aside from its weight utility, kids love the candy-filled surprise ending. My taste preference is for Skittles and they don’t melt, so even better. If you prefer to bypass the candy route you can fill the bottoms with rice, but . . . boring!
For easy stacking use at least two different size melon ballers. 


Blueberry Mint Lemonade


With warm weather struggling to break up the snow and ice (or fog, depending on what part of the country you live in), I couldn't imagine anything more delicious on a Friday afternoon than a tall, cold glass of lemonade. Add blueberries for sweetness and mint for a bit of excitement and you'll have warm weather, if only in a glass!

Blueberry Mint Lemonade

1 cup of freshly squeezed lemon juice
3/4 cup superfine sugar
4 cups water
1 cup fresh blueberries, stems removed
1/3 cup fresh mint

Juice lemons into a large pitcher; add sugar and water, then stir to combine and dissolve. Add blueberries and mint, then serve.

Notes: The longer you let this lemonade stand, the more the flavors will mix and mingle. Whip up this easy recipe in the morning and it will be perfect with lunch!
Missing your Friday night cocktail? Just add a ounce or two of vodka to each glass, then stir!


Double Decker Taco Cupcakes


Wonton wrappers make for perfectly sized pasta squares that can be layered in muffin tins with taco meat, beans, cheese, and crushed chips.


Seriously yummy, cute, and super fast.


Prep Time: 10 min                          Total Time: 30 min                       Serving Size: 18 cupcakes


Ingredients

-1 pound ground beef
-1 (1.25 ounce) package of Old El Paso taco seasoning mix
-36 wonton wrappers
-1 (16 ounce) can Old El Paso refried beans
-36 tortilla chips
-2 cups shredded cheddar cheese
-optional toppings: sour cream, diced tomatoes, cilantro, onion


Directions

1. Preheat the oven to 375 degrees. Spray 18 muffin cups with cooking spray.
2. Brown beef in a skillet and drain the fat. Add the taco seasoning mix and water called for on the package and simmer for 4-5 minutes. Set aside.
3. Place one wonton wrapper in the bottom of each muffin cup. Layer about 1 Tbsp of refried beans on top of each wonton. Crush one tortilla chip on top of the beans. Top with 1 Tbsp of taco meat and 1 Tbsp of shredded cheese. Repeat the layers again with a wonton wrapper, refried beans, tortilla chips, taco meat, and cheese.
4. Bake for 15-18 minutes or until golden brown.
5. Remove cupcakes from tin and top with your favorite taco toppings (i.e. sour cream, diced tomatoes, onion, or cilantro)


avocado, tomato, sprouts & pepper jack with chive spread


Ingredients:

Chive Spread

1/4 cup Greek yogurt
1 tablespoon finely chopped fresh chives
Salt and pepper, to taste

Avocado Salad

-1 avocado, peeled, pitted and diced
-1 tomato, cored and chopped
-1 cucumber, peeled, seeded and diced
-Squeeze of lime juice
- 2 tablespoons chopped fresh basil or cilantro
-Salt and pepper, to taste
-4 slices whole grain bread or 4 small mulitgrain tortillas
-1/4 cup alfalfa sprouts
-2 to 4 slices lite pepper jack cheese

In a small bowl, mix the Greek yogurt and chives. Season with salt and pepper. Set aside.

In a medium bowl, gently toss together the avocado, tomato, cucumber, lime juice and basil or cilantro. Season with salt and pepper, and set aside.

Spread the chive-yogurt mixture on all four bread slices. Divide the sprouts between two slices of bread, and top with avocado salad and cheese. Cover with the remaining slices of bread. (If using tortillas, spread the chive-yogurt mixture on the tortillas, and top with cheese, avocado salad and sprouts. Roll, and eat.) Makes 2 large sandwiches or 4 small wraps.


Watermelon Lime Sorbet Slices

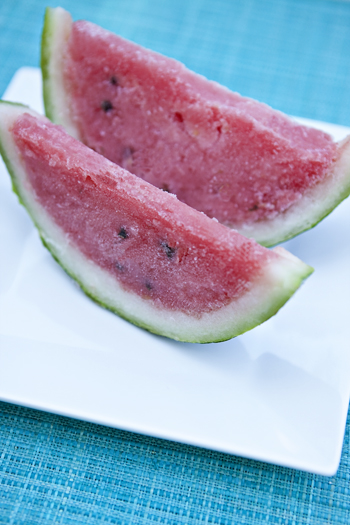
A sweet and tangy watermelon lime sorbet is a great way to cool off in the summer. As a bonus, this recipe is frozen back in the watermelon rind and cut off into slices.


It’s hot. The type of heat where when you step outside the door and your skin is wet before the door swings shut behind you. It’s a hot that hangs in the air, letting you breathe it in, that is cured only by two things: being completely immersed in water or hiding indoors, the air conditioning cranked as far as it will go.

I find that the heat makes me very unmotivated to do things like take a walk, water and weed the garden (though I have forced that one on myself) and prepare food and eat it. However, when the promise of cooking provides ice cold watermelon sorbet, I just may be convinced. I’m fairly certain it didn’t take much convincing to get the kids to come grab a slice or sorbet either.

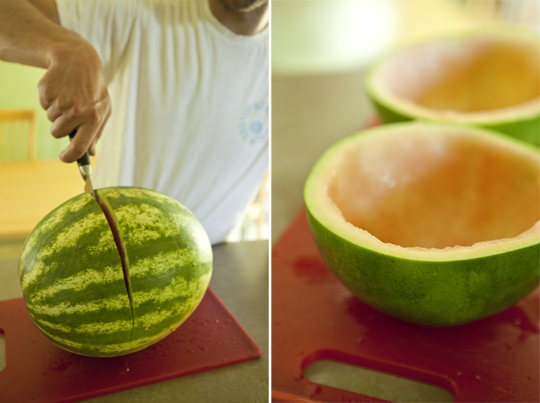
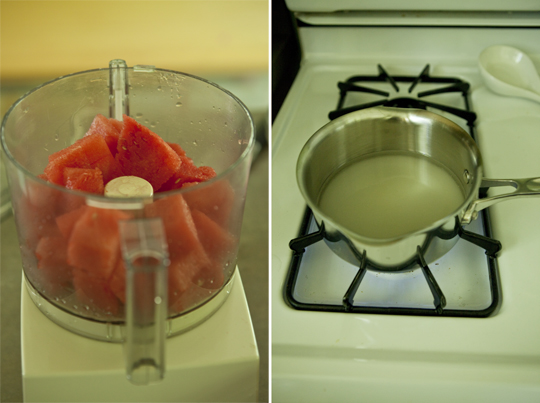
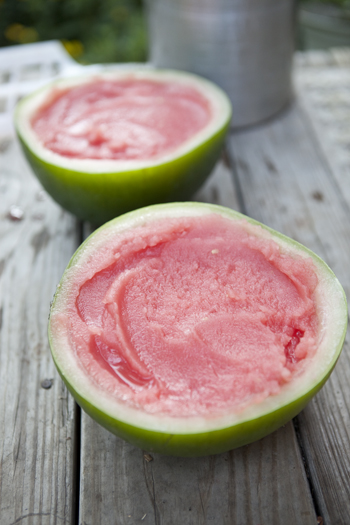
Start by cutting your watermelon as a simple syrup simmers on the stove. If you’re going to serve your sorbet in the rind, cut a watermelon (smaller is better) in half and scoop the watermelon flesh out. Place the hollowed-out rinds in the freezer to get cold while you make your sorbet.


When your simple syrup is cool and watermelon chunked, blend them together in a food processor or blender until smooth. Add in lime juice to cut the sweetness. The first time we made watermelon sorbet we didn’t do this, and it was much too sweet for our taste. I went with a 1/3 cup lime juice.


Cool the liquid completely in the refrigerator for a few hours. When it’s good and cold, throw it in your ice cream machine and freeze. If you saved them, take your watermelon rind out of the freezer and fill it with your sorbet, perhaps throwing in a few mini chocolate chip “seeds” along the way.


This then goes into the freezer. It really doesn’t need that long, and if you let it sit for four to five hours, you’ll be ready to slice easily. Longer freezing just requires you to take it out a bit before you want to scoop or slice. No rind? Just store in an airtight container until ready to serve.


A few tips if you want to make slices:

Use a small, personal size watermelon.
Freeze only long enough for the sorbet to set, or if you freeze longer, give it a good amount of time on the counter to soften up.
Dip your knife (I used a large chef’s knife) in warm water in between each cut, and try to cut 2″-3″-thick slices off the watermelon. Too thin and they don’t hold together as well.
How are you staying cool in the midst of this heat wave? Are you enjoying the pool, spending time hiding indoors or heading towards museums and other air-conditioned retreats?

Watermelon Lime Sorbet

1 cup water
1 cup sugar
8 cups cubed fresh watermelon
1/3 cup lime juice

Place water and sugar in a saucepan over medium heat. Bring to a boil and cook until sugar is completely dissolved to create a syrup. Remove from heat and allow to cool.

In a food processor or blender, mix together watermelon cubes, syrup and lime juice. Blend until smooth. Add to an ice cream machine and freeze according to manufacturer’s directions. Serve immediately as soft serve sorbet or freeze in an airtight container and remove a few minutes prior to serving to let soften for scooping.


Makes 8-10 servings.